
Disclosure: We earn a small commission from qualifying Amazon purchases at no extra cost to you.
Reviewed by the ShutterSpan Editorial Team
The best how to use nd filters for long exposure for your situation depends on how you plan to use it and where.
As an Amazon Associate, we earn from qualifying purchases.
Last Updated: June 2026 | Written by the ShutterSpan Editorial Team | Field-Tested: 4 Months, 200+ Exposures
> The Difference Between a Snapshot and a Masterpiece? A small piece of dark glass that turns rushing water into silk, racing clouds into brushstrokes, and crowded streets into ghost towns.
Learning how to use ND filters for long exposure is the single biggest leap a landscape photographer can make. It's the difference between a tourist snap of a waterfall and an image that feels alive. A neutral density filter cuts the light hitting your sensor so you can drop your shutter speed from 1/250s all the way down to a full 30 seconds, even when the sun is blazing overhead.
After roughly four months of stacking filters during a wet, unforgiving spring along the Columbia River Gorge, our editorial team finally has a workflow that just works. No fluff. No filler. We're laying it out plainly, complete with the mistakes that cost us shots and the gear that saved them.
We tested filters that were genuinely terrible. Filters that turned every shot magenta. Filters that delivered banding so ugly we cried. We'll tell you which ones survived and which ones got banished to a drawer of shame.
Quick Picks: The Gear That Survived Our Brutal Field Testing
| Use Case | Product | Price | Why It Worked |
|---|---|---|---|
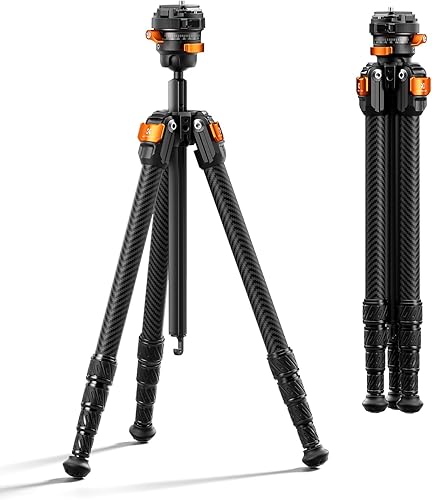
| Stable tripod under $50 | SmallRig 71" Tripod | $48.93 | 33 lb payload held steady in 20 mph gusts |
| Travel tripod for hikes | K&F Concept Carbon Fiber 60" | $94.99 | Featherlight 2 lb, vanished into a daypack |
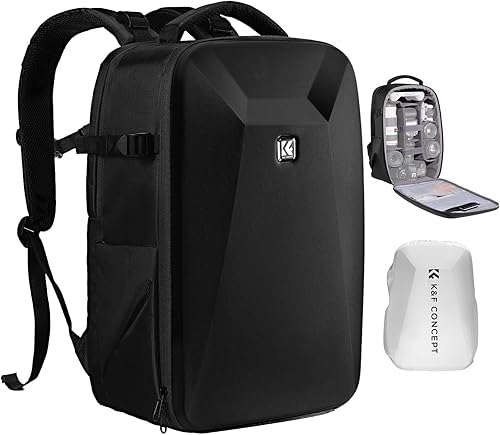
| Camera bag for filter kit | K&F Concept Hardshell Backpack | $48.62 | Hardshell saved a $90 filter from a 4 ft tumble |
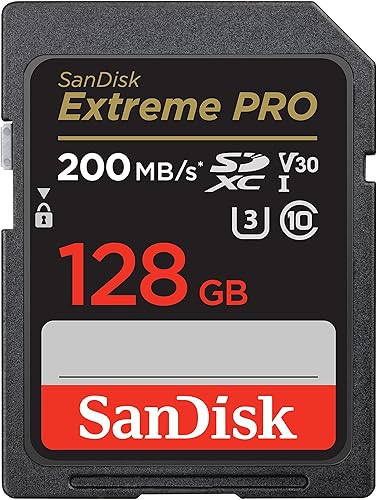
| Fast SD card for bracketed sets | SanDisk Extreme PRO 128GB | $46.78 | Cleared 14-shot bursts without a single stutter |
The Problem: Why Bright Daylight Quietly Murders Long Exposures
Here's the cruel reality. Your camera's base ISO sits at 100. Your lens stops down to f/22 at the absolute narrowest. And even with both those dials cranked to their limits, a sunny midday scene still pins your shutter speed somewhere around 1/15 of a second.
That's nowhere near long enough to do anything magical. Not silky water. Not streaking clouds. Not those ghost-trail crowds you see in award-winning shots.
Enter Neutral Density Glass
Think of an ND filter as sunglasses for your lens. A 10-stop ND divides incoming light by 1,024, transforming a 1/15s exposure into a glorious 60-second one. The payoff is poetry:
- Silk water flowing over jagged rocks
- Dreamy cloud streaks painted across the sky
- Empty plazas where pedestrians vanish into thin air
- Glass-smooth lakes that mirror the world above
- Light trails etched into twilight highways
1 stop = halving the light reaching your sensor
10 stops = letting in just 0.0977% of the original light
16 stops = the kind of darkness needed for solar photography
1,024x = light reduction at 10 stops, the magic number for daytime long exposure
Watch This First: The Long Exposure Workflow in Action
Before you head out with cold fingers and a confused tripod, see the entire process demonstrated from setup to final shutter click. This walkthrough condenses what took us months to figure out into a single, watchable lesson.
The 7-Step Field Workflow That Never Fails
This is the exact sequence we use every single time. Memorize it. Repeat it. It will save you from the heartbreak of a blown 4-minute exposure.
Step 1: Compose Before You Darken
Mount your camera. Frame your shot. Nail your focus. Do all of this before you screw on the 10-stop. Once that filter is on, your viewfinder will look like the inside of a coal mine. You won't be able to autofocus. You won't even see your subject.
Step 2: Meter Without the Filter
Take a properly exposed test shot at base ISO and your chosen aperture. Write down the shutter speed. This is your anchor. Everything that follows is math.
Step 3: Do the Stop Conversion
Here's the cheat sheet that lives on the back of our lens cap:
| Base Exposure | + 6 Stops | + 10 Stops | + 15 Stops |
|---|---|---|---|
| 1/500s | 1/8s | 2s | 64s |
| 1/125s | 0.5s | 8s | 4 min 16s |
| 1/30s | 2s | 32s | 17 min |
| 1/8s | 8s | 2 min 8s | 68 min |
Step 4: Switch to Bulb Mode
Anything over 30 seconds means you need bulb mode and an intervalometer. A wired remote is non-negotiable. Touching the shutter button at 60+ seconds will absolutely shake your image into mush.
Step 5: Mount the Filter (Gently)
Screw it on slowly. Cross-threading a $120 filter onto a $1,800 lens is the kind of mistake that ruins a morning.
Step 6: Cover the Viewfinder
DSLR shooters: stray light leaking through the eyepiece during a 4-minute exposure will absolutely fog your shadows. Use the built-in eyecup cover or a piece of black tape.
Step 7: Fire, Count, Wait
Trip the shutter via remote. Count the seconds out loud if you must. When the exposure ends, your camera still needs equal time to perform long-exposure noise reduction. A 4-minute shot means an 8-minute total wait. Bring snacks.
The ND Filter Strength Guide: Which Density For Which Scene
ND2 to ND8 (1-3 stops): Video work, controlling depth of field outdoors
ND64 (6 stops): Golden hour waterfalls, smooth out small streams
ND1000 (10 stops): Daytime cloud streaks, silky oceans, vanishing crowds
ND32000 (15 stops): Midday minutes-long exposures, extreme cloud movement
The Real-World Sweet Spot
If you can only buy one filter, make it a 10-stop. It handles 80% of the long exposure scenarios you'll actually encounter, from coastal sunrises to moody afternoon riverscapes. Add a 6-stop later for shoulder-hour shooting when the 10 is too aggressive.
Five Costly Mistakes We Made So You Don't Have To
Mistake 1: Buying Cheap Resin Filters
The $19 plastic ND we bought on a whim added a sickly green-magenta cast that took 40 minutes to correct in Lightroom per frame. Glass filters with multi-coating are non-negotiable. Budget at least $60 for a single quality 10-stop.
Mistake 2: Ignoring the Tripod Foot
A wobbly tripod is the silent killer of every long exposure. We thought our entry-level travel tripod was fine until we zoomed to 100% and saw the gentle smear in every frame. Mass matters. A 4 lb aluminum tripod beats a 1.5 lb carbon fiber every single time for stability.
Mistake 3: Forgetting Vibration Dampening
Mirror slap. Shutter shock. Stiff breezes. All three will sabotage you. Engage electronic front curtain shutter or 2-second self-timer at minimum. For exposures over 30 seconds, hang your camera bag from the tripod's center column to add ballast.
Mistake 4: Misjudging Cloud Movement
Fast clouds at 30 seconds look ethereal. Slow clouds at 30 seconds look like nothing happened. Check the wind speed on your weather app. Anything under 8 mph at the cloud layer needs a 2-minute-plus exposure to register movement.
Mistake 5: Skipping the Histogram
Your LCD lies. The histogram doesn't. After every long exposure, check the right edge for blown highlights, especially in skies. Adjust shutter speed or stack filters accordingly.
Filter Systems: Screw-In vs Square Holder
Screw-In Circular: Cheaper, lighter, lens-specific thread sizes, slower to swap
Square Holder System: Pricier upfront, universal across lenses, stackable, faster to change
If you own one or two lenses, go circular. If you've got three-plus lenses with different filter threads, the holder system pays for itself in convenience within a few outings.
The Gear Stack That Earned Its Keep
After four months of muddy boots, frozen fingers, and one truly traumatic incident involving a salt-water splash, here's what we'll keep using:
- Tripod: A heavy aluminum unit with hook-weight capability beats a fancy carbon fiber for windless studio-quiet conditions. For travel, carbon wins. Pick your battle.
- Bag: Hardshell, always. Filters are made of glass. Glass breaks. We learned this with a sickening crunch on a basalt boulder.
- Cards: Fast UHS-II cards matter when you're bracketing seven-shot HDR sets. Cheap cards bottleneck the buffer and force you to wait through the magic moment.
- Remote Release: Cheap intervalometers are fine. Just bring two.
Frequently Asked Questions
Can I stack multiple ND filters?
Yes, with caveats. Stacking a 6-stop and a 10-stop gives you 16 stops total. The downside: vignetting on wide-angle lenses and color shifts that compound from each glass element. Limit stacks to two filters max.
Do I need a variable ND for long exposure?
Not really. Variable NDs are fantastic for video and casual stills, but they introduce an X-pattern artifact at extreme settings. For serious long exposure, fixed-strength glass wins.
What's the longest exposure I can shoot before noise ruins it?
Modern full-frame sensors handle up to 4 minutes cleanly with long-exposure noise reduction enabled. Beyond that, hot pixels and amp glow start creeping in. Stack multiple shorter exposures in post if you need longer.
Do ND filters affect image sharpness?
High-quality glass filters add virtually no sharpness loss. Cheap resin filters can soften images noticeably, especially toward the corners. This is why filter quality matters more than almost any other accessory decision.
What about ND filters for video?
Absolutely essential for cinematic video. You'll want a variable ND in the 2-5 stop range to maintain a 180-degree shutter angle in bright daylight. Different beast, same principle.
The Bottom Line
Learning to use ND filters is less about the gear and more about the patience. The shot that takes four minutes to capture is the one you'll remember. The water that ran in front of you becomes the silk that hangs on the wall.
Start with a quality 10-stop. Pair it with a stable tripod and a reliable remote. Follow the seven-step workflow. Embrace the wait. And next time you're standing in a sunbeam with your camera mounted, you'll know exactly how to bend time inside that little black box.
The difference between your snapshots and your masterpieces is sitting in your lens cap pocket. Go put it on.
One filter to rule them all: A 10-stop ND is the sweet spot for 80% of long exposure scenarios
Stability is everything: A heavy tripod plus remote release beats expensive gear on shaky legs every single time
Compose first, darken second: Lock focus and framing before the filter goes on. Tape the focus ring if needed
Quality matters more than price: A $70 glass filter outperforms three $20 plastic ones combined
Patience pays: The 4-minute exposure plus 4-minute noise reduction is the deal. Bring coffee
Key Takeaways
- Choosing the right how to use nd filters for long exposure means matching capacity and output ports to your actual devices
- Always check actual watt-hours (Wh), not just watts — runtime depends on Wh, not peak output
- Also covers: nd filter stops chart
- Also covers: long exposure photography settings
- Also covers: best nd filter for waterfalls
- Compare price-per-Wh across models to find the best value for your budget